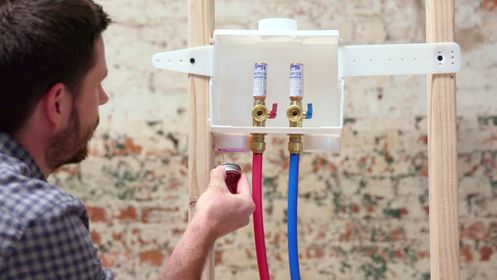
Spot On Plumbing specializes in providing washer box repairs and replacement services to homeowners in the local Tulsa, OK, community. Your washer box is an essential part of your laundry room, responsible for connecting your washing machine to your home's plumbing system. Over time, this box can become damaged or worn out, leading to leaks and other issues. In this article, we will discuss how to replace your washer box to ensure your laundry room stays in top condition.
Upgrade Your Laundry Room: Washer Box Replacement Guide
Caitie Brown

Washer Box Importance
Signs of a Damaged Washer Box
Before we dive into the replacement process, it's important to know the signs of a damaged washer box. These may include leaks, rust, or cracks in the box itself. You may also notice water pooling around the box or a foul odor coming from your laundry room. If you notice any of these signs, it's time to replace your washer box.
Gather Your Tools and Materials
Before you begin the replacement process, make sure you have all the necessary tools and materials. These may include a new washer box, a wrench, Bixby Plumber's tape, and a bucket to catch any water that may leak during the process. It's also a good idea to have a towel or rag on hand to clean up any spills.
Shut Off the Water Supply
The first step in replacing your washer box is to shut off the water supply. This can usually be done by turning off the water valves located behind your washing machine. If you cannot locate these valves, you may need to shut off the main water supply to your home.
Remove the Old Washer Box
Using your wrench, carefully remove the connections between the old washer box and your plumbing system. Be sure to have your bucket ready to catch any water that may leak out. Once the connections are removed, you can then remove the old washer box from the wall.
Install the New Washer Box
Place the new washer box in the same location as the old one and secure it to the wall using screws. Next, use Bixby Plumber's tape to wrap around the connections on the new washer box. This will help create a tight seal and prevent leaks.
Reconnect the Plumbing
Using your wrench, reconnect the plumbing to the new washer box. Be sure to tighten the connections to ensure a secure fit. Once everything is connected, turn the water supply back on and check for any leaks. If there are no leaks, you can then turn on your washing machine and test the new washer box.
Clean Up and Maintenance
After the replacement process is complete, be sure to clean up any spills or messes that may have occurred. It's also a good idea to regularly check your washer box for any signs of damage or wear and tear. This will help prevent any future issues and ensure your laundry room stays in top condition.
By following these steps, you can easily replace your washer box and keep your laundry room functioning properly. If you have any questions or need assistance, be sure to consult a professional Bixby Plumber. With proper maintenance, your new washer box should last for years to come. Contact Spot On Plumbing of Tulsa plumbers for all your emergency plumber needs.
